How to Move Layers in Alight Motion – Group And Ungroup

Would you like to superimpose your video clips by getting great flexibility and editing control through the Alight Motion layer editing process? If yes, then you must also know how to move layers in Alight Motion and how to group and ungroup them. Please don’t dwell on it! We’re here to help you to become an expert in using all features of Alight Motion, and in this article, we’ll discuss how to create, move, group, and ungroup layers in Alight Motion in straightforward steps.
Importance of Layer System in Alight Motion
Before discussing the motion and grouping of layers in the Alight Motion Mobile App, it’s compulsory to know the importance of these layers and consider why we’re examining them in detail. These layers help us to add and manipulate a specific effect, graphic, text, or any other element separately without affecting other elements. Suppose you want to edit a video; you can add one layer of video footage, a second layer of audio or background music, a third layer of effects, and a fourth layer of text. After making these different layers, you can individually control or edit one layer without affecting others.
How to Move Layers in Alight Motion: Easy Steps
We can use Alight Motion, a versatile mobile application, to effortlessly create captivating animations and videos. Its fundamental aspect that empowers us to bring our creative vision to life is manipulating through layers. Because it’s essential to know how to move layers in Alight Motion, that’s why you need to follow the following simple steps:

How to Extend & Shorten a Layer?
Extending and shortening the length of a layer will help you to increase and decrease the playtime of that specific layer within the video. Follow the following steps to increase or decrease the duration of any layer:
How to group layers in Alight Motion?
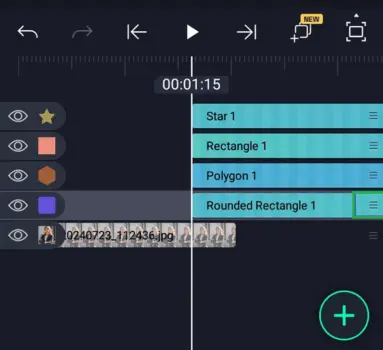
If you want to edit 2 or more layers at the same time and want to design them with the same visual effect, then you can group them through the following steps:

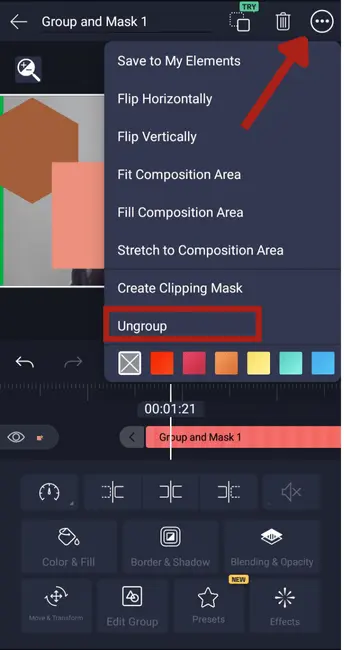
How to Ungroup Layers?

Process for Hiding & Unhiding of Layers
This process is as simple as taking a bite of bread because you can hide or unhide a layer in a single click. If you want to hide a layer, click on the eye-shaped icon for a single time, and to unhide it, click on the same icon again. You can effortlessly remove and show a specific text, audio, video, or other element in a single click if you’ve manipulated it through layer editing.
Final Words
You’ll not only find the answer to your question “how to move layers in Alight Motion” from this article, but after reading it, you’ll also become able to group, ungroup, stretch, and trim them. We’ve discussed all the steps because without knowing them, you can’t perform your video editing task efficiently and can’t claim to be a video editing expert. All the above-discussed methods will offer you more flexibility to enhance your videos’ visual appearance on the official Alight Motion app and the Alight Motion Mod APK. Moreover, you can use this same method either you’re using Alight Motion for PC or Alight Motion for iOS.
